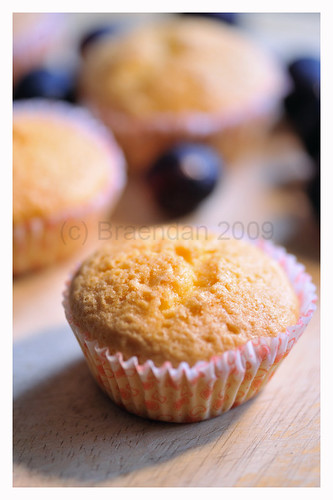
Ever looked at food magazines and wondered how they produce such amazing food shots? Its easier than you think. Today I am going to show how I produce the above image. I took a shot of the entire setup to aid the explanation process.
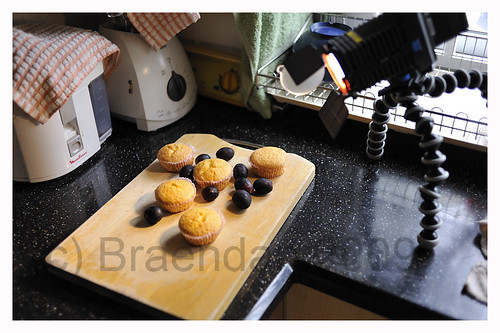
All you really need is to get your creative juices moving, practice some patience, a window with lights (excellent fill light) and last but not least a main light e.g. off camera flash, flashlight or even like what you see in this scene a video light is used as the main light.
Some of you may have more questions than before so here are some which I could think of:
Q: Whats all this talk about main light fill light. Its driving me nuts.
A: Consider main light as your PRIMARY light source while fill light is your SECONDARY light source. The main light will shape your subject, bring out the features, textures etc depending on what you shoot. The muffin above for example, the textures on the muffin would have been lost without a main light. While the secondary light source complements the entire scene softening shadows etc.
Q: Why did you position the light that way? and why is that image shot against the light source?
A: It's position that way so the it brings out the texture of the muffin since that is my main subject. Too low or too high and I would have lost the details on the muffin. General rule of thumb is to place the light source at a 45 degree angle but do take note of the subject and also what you want to achieve.
I personally find shooting in perpendicular against the light creates a more pleasing image. Its not wrong to shoot in the same direction as the light, I personally don't find it interesting.
Q: Why did you use a yellow light source?
A: Food tends to look nicer under yellow light don't you agree?. Haven't you noticed restaurants tend to use yellow light a LOT?


Thanks for the informative tutorial.
ReplyDeleteI see you have a Gorillapod as well. :)
Glad you found it to be informative :). Yes the gorillapod is very useful and flexible for setups like this.
ReplyDeleteGreat and simple to understand explanation of lighting in food photography. The pics turned out great. I myself am a noob photographer - will definitely try this out to experiment on the effects!
ReplyDeleteHello,
ReplyDeletei have just discovered your blog, and was wondering what setup (camera & lens)are you using?
Thanx,
catalin
Dear Catalin,
ReplyDeleteFor the actual shot I was using a D3 with a Nikkor 105mm macro lens. The documentation shot of the entire setup was done using a D700 with a Nikkor 35mm f/2D lens.
HTH,
Braendan