I have grown accustom to having grid lines on my focusing screen. Had that on the D300, D700 but the D3 did not provide such functionality. I viewed that as an important feature especially when composing, doing hand held panorama, architectural etc.
Since this is not a software / firmware functionality which you can just turn on or off the only way to have grid lines is to change the focusing screen. There are currently two choices in the market one from Nikon which they call Type E and the other from this company called Katz Eye. I choose Nikon because of the price and I don’t have to order it online.
After a few weeks wait for stock availability the focusing screen finally arrived. Before we proceed, let me make a few points clear.
- Point 1 – I will not be held liable if anything goes wrong. You do this on your own risk.
- Point 2 – Do not attempt to use any form of force. If force is required means something went wrong.
- Point 3 – When in doubt please get someone experience to do it for you.
- Point 4 – Wash and dry your hands before doing this.
- Point 5 – Since you will be exposing your camera please don't do this in the open.
Step 1

Step 2


Step 1 - This is the standard package. It comes with the grid line focusing screen and a clipper. I will get to that later.

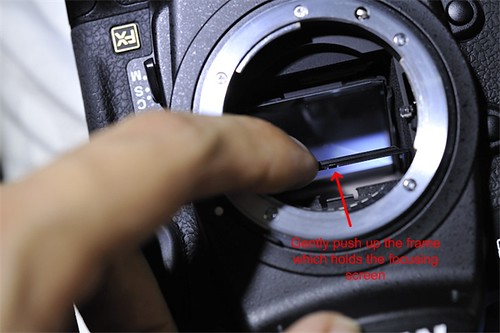
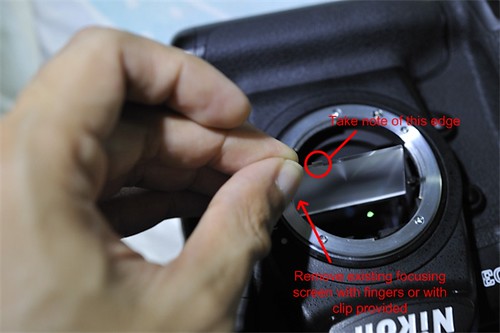
Step 2 - Before we proceed, let have a basic understanding on what to expect. In order to change the focusing screen you must first release the clip which holds the frame. You can then lift the frame gently with your fingers. Tilting the camera to a little bit and the existing standard focusing screen should come out. See above.
Step 3


Step 3 - Now that you have understood the steps involve lets begin. Using your fingernails gently release the clip following the direction of the arrows. Remember do not use force.
Step 4
Step 7 - Mission completed. Mount your lens and you are back into action.
Step 4 - Gently push the frame up. Now all you need to do is tilt your camera towards the direction of the arrow to dislodge the focusing screen which is underneath the frame.
Step 5
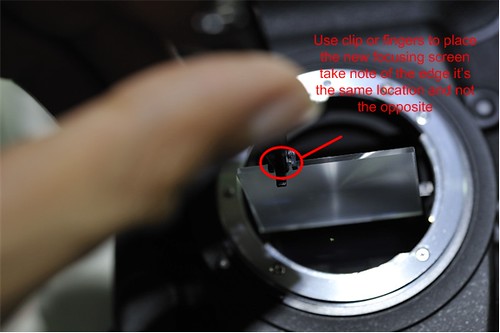
Step 6 - Gently put in the new focusing screen. Once its in tilt it again and it should lodge itself right into place. Gently push the frame back down and ensure its properly lock. Please do not use force.Step 7 - Mission completed. Mount your lens and you are back into action.


This was helpful, thank you!
ReplyDeletePatrick
Thanks for the post. Used this today when installing for my D3s
ReplyDeleteThanks so much for the post, very helpful!!
ReplyDelete