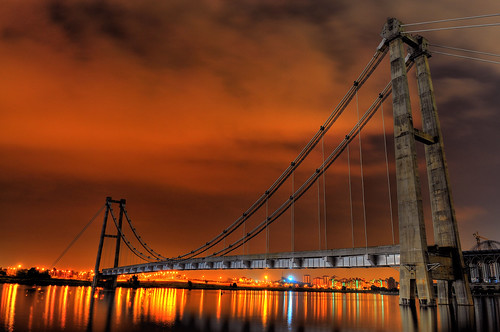
 (Photomatix HDR with 5 Exposures)
High dynamic range imaging or HDR is a type of technique employed by photographers to ensure a greater dynamic range (details in the light and dark areas are nicely exposed) within their images. Such technique is used mainly in scenes where there are extreme contrast between the light and dark areas. Introductions aside, there are mainly 3 methods for HDR, Method 1 would needs to be done on location while Method 2 and 3 involves post processing in the digital darkroom.
Method 1 – Multiple Exposure Bracketing
 (Photomatix HDR with 5 Exposures)
Bracketing is where you take different exposures of the same scene. The number of exposure can range from 2 to or more depending on the photographer preferences. A combination of sturdy tripod, shutter release with mirror up mode is recommended to ensure sharp images. The typical workflow for Method 1 would be:
Step 1 – Take different exposure of the scene. Please check your camera user manual for exposure bracketing
Step 2 – If you shoot RAW, you will need to convert those files to jpeg. Do not apply any adjustments to it as it may impact the outcome of the image.
Step 3 – Import the jpeg files into a HDR program like Photomatix
Step 4 – Follow the step by step guide of the program and you’re done.
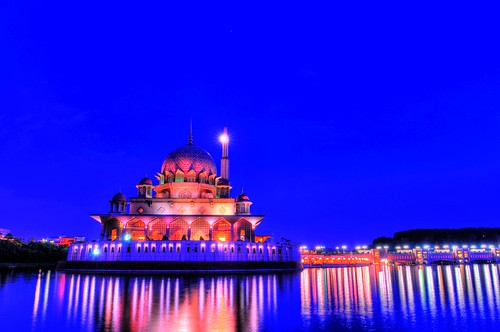
Method 2 – Single RAW file
 (Photomatix HDR with Single .NEF)
Step 1 – Take your shot. Ensure it is properly exposed. Use the histogram as a guide.
Andre Gunther created a detailed step by step guide. You can check it out here.
Method 3 – Single jpeg file with Dynamic HDR
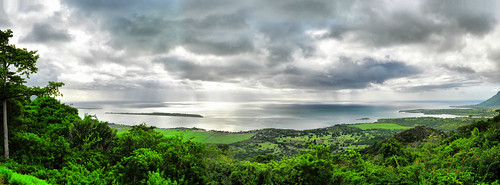
 (Panorama 3 jpegs hand held with Dyamic HDR)
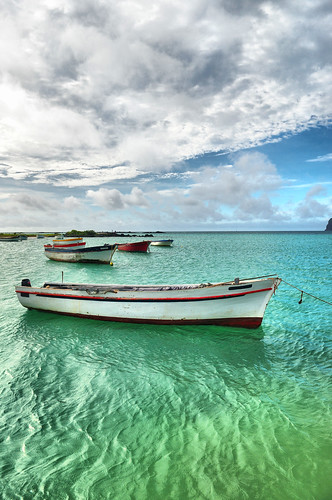
 (Single jpeg with Dyamic HDR)
Step 2 – You can download the software and follow the step by step guide here.
Step 1 – Take different exposure of the scene. Please check your camera user manual for exposure bracketing
Step 2 – If you shoot RAW, you will need to convert those files to jpeg. Do not apply any adjustments to it as it may impact the outcome of the image.
Step 3 – Import the jpeg files into a HDR program like Photomatix
Step 4 – Follow the step by step guide of the program and you’re done.
Method 2 – Single RAW file
 (Photomatix HDR with Single .NEF)
This method is suitable when you want to take HDR of a scene but that scene has a lot of moving objects or subjects.
Step 1 – Take your shot. Ensure it is properly exposed. Use the histogram as a guide.
Step 2 – If you use Photomatix you can actually just import the RAW file into it and follow the instructions on the screen.
Step 3 – If you are not planning to use Step 2 you can actually use any RAW program to create multiple exposure from a single raw file.
Step 3 – If you are not planning to use Step 2 you can actually use any RAW program to create multiple exposure from a single raw file.
Andre Gunther created a detailed step by step guide. You can check it out here.
Method 3 – Single jpeg file with Dynamic HDR
 (Panorama 3 jpegs hand held with Dyamic HDR)
If method 2 was not cheating enough this would be the king of all hehe. Anyways I see this as a very useful addition to your post processing arsenal. You will never know when you might need it. I personally found this to be a life saver on days when you forget to change your settings or when you don’t have time to properly meter a scene.
 (Single jpeg with Dyamic HDR)
Step 1 – Take a shot of the scene. Proper exposure is of course preferred. But that don’t always happen in real life e.g. when your wife is nagging at you for bringing the camera along or when you only got one shot and you forgot to use RAW.
Step 2 – You can download the software and follow the step by step guide here.


No comments:
Post a Comment