Showing posts with label review. Show all posts

Thursday, July 30, 2009

AF-S NIKKOR 70-200mm f/2.8G ED VR II

Nikon today announce 2 new DX bodies and 2 new lenses. One of those lenses which caught my attention was the newly redesigned Nikkor 70-200mm VRII. The questions running through my mind was:

1. What's the main difference between the two?

2. Was the changes made, justify the upgrade?

I did some research and compared the both. If you are reading this you are probably doing the same. Do post some comments on your thoughts as well. Below is a quick comparison highlighting only the difference between the two:

1. Glass elements - The new Nikkor has a lens construction with 21 elements / 16 groups (7 ED, 1 Nano) vs 21/15 (5 ED).

2. Focusing distance has been improved to 1.4m vs 1.5m on the old Nikkor.

3. The new Nikkor is shorter but the difference is not huge 87 x 209 mm (New) vs 87 x 215mm (Old).

4. The new Nikkor is slightly heavier 1,530g (New) vs 1,470g (Old)

So what does this mean?

1. Extra ED elements - the current one is prone to CA under certain shooting conditions (personal experience). The new one should have increased sharpness and color correction capabilities by minimizing CA (base on spec sheets).

2. Added Nano coating helps reduce flare, not that that current one is prone to it. Add the hood and that would minimize the risk further.

3. Closer focusing distance but not by a huge difference. I find this annoying at times so this is a welcome plus points.

4. VR II helps you gain additional stops which aids in getting sharper images in low light conditions or when the shutter is slow.

5. Shorter but heavier. The shorter is a welcome advantage, doubt the length and weight makes much difference if you look at the spec sheets.

6. MTF chart comparison shows sharper images on the edge.

So are all the points above worth the upgrade? To me personally the current one which I have is sufficient for my needs and the edge softness does not really border me. So I will put a hold on this until sample images come out on dpreview. I am very interested in the focusing speed and whether is has been improved further.

Monday, June 22, 2009

UV Filters are not created equal

I did a personal test a while back and documented the results here. Some of my findings on B+W and Hoya filters were similar to the tests conducted by this site. Anyways, this site provides an in-depth look at some of the popular UV filters in the market and how well they perform in 3 areas (light transmission, flare and vignetting).Have a look at the results for other range of UV filters here.

Wednesday, June 17, 2009

Canon 500D vs. Nikon D5000

If you have not taken the plunge into the DSLR world and was considering to go with either one of the above entry level and you like to read all the facts and figures well this one may be your cup of tea. DXOmark recently did a sensor performance comparison between the two you can check out the review here.

The conclusion to the test was:

"The Nikon D5000 sensor obtains exceptional results for low ISO settings and outperforms the Canon EOS 500D sensor in Dynamic Range and Color Depth. When ISO increases, however, the differences become smaller, but the Nikon D5000 still maintains a slight advantage."

Friday, April 24, 2009

Nikon D5000 Review


For people scouring the Internet looking for a review on Nikon D5000, I found a non English site (quesabesde.com) which did a very comprehensive review of this unit ;). I was particularly interested in the ISO performance of this unit and since dpreview site did not have high ISO sample pictures (don't quote me I could be wrong) this site had it.

If you understand hrmm french...? I am just guessing pardon my ignorance. You can just click here and read it anyways. Alternatively you can jump straight to the high ISO sample images:

1. Some still life shots taken at ISO 3200
2. The same still life shots taken at ISO 6400
3. At a concert taken at ISO 6400
4. A building taken at night at ISO 3200

Sunday, April 05, 2009

UV Filters are they worth it?

There has been a debate raging in the internet about whether is it wise to add an additional piece of glass filter in front of your expensive lenses as a form of protection against the elements of daily usage. Skeptics say this additional piece of glass filter would impact the quality of your image (contrast, sharpness, color rendition, tonal range). While others claim this piece of glass could actually help protect your investment against accidental scratches, bumps, make cleaning easier and safer etc.

The most common glass filter used on the lens today would be the ultraviolet filter or UV filter which the manufacturer claims; helps absorb the ultraviolet rays which often make outdoor photographs hazy and indistinct it also serves as a permanent lens protector. So the million dollar question on my mind was whether:

1. The filter really affects contrast, sharpness, color rendition and tonal range?
2. Since I have Hoya and B+W with distinct price difference. Is there a difference between the two?

To answer the above questions, I ran a test on both filters using a D3 equipped with a AF-S VR Micro-Nikkor 105mm f/2.8G IF-ED lens. Reason for this lens was because of its legendary sharpness and details.

As for the images, everything was shot in RAW opened in Capture NX and converted to jpeg with NO post processing. So the sample images below are from that conversion in Capture NX and NOT in camera jpeg. Matrix metering was used to ensure consistent exposure of the entire scene.

Test Scenario Landscape

I like this particular scene because of the detail it provides. It has an excellent tonal range from dark tones in the shack and on the foliage to the highlights from the sun on the building. Clicking on the image would lead to the original image itself.

_DSC3847_NO_.JPG
No Filter | ISO 200 | 1/200s | f/11 | 0EV

_DSC3848_HOYA_.JPG
Hoya HMC UV Filter | ISO 200 | 1/200s | f/11 | 0EV

_DSC3849_BW_.JPG
B+W UV Filter | ISO 200 | 1/200s | f/11 | 0EV

I also have 200% zoom samples of the blue barrel No UV, Hoya and B+W.

Test Scenario Brick wall

The classical brick wall. Not the average brick wall which you see in some test but it should be sufficient. Take note of the histogram between the above and the one here. Did you notice how consistent the results are? Clicking on the image would lead to the original image itself.

_DSC3851_NO_.JPG
No Filter | ISO 200 | 1/160s | f/8 | 0EV

_DSC3850_HOYA_.JPG
Hoya HMC UV Filter | ISO 200 | 1/160s | f/8 | 0EV

_DSC3852_BW_.JPG
B+W UV Filter | ISO 200 | 1/160s | f/8 | 0EV

I also have 200% zoom crop samples No Filter, Hoya and B+W.

Findings

The exposure indicator was in the center for all the scene and the camera gave the same reading for Hoya, B+W and no filter. Through the naked eye it would be difficult to differentiate the image unless you pixel peep but if you compare the histograms carefully you can see the difference.

No_UV.JPG
No UV Filter

Hoya.JPG
Hoya HMC UV Filter

BW.JPG
B+W UV Filter

Exposure: the Hoya produces a slightly darker image while the B+W tend to produce a slightly overexposed image when compared against the image without any filters. This result is consistent across two sets of test scenarios.

Tonal Range / Color / Contrast: Since the exposure is affected it produces a domino effect which in turn affects the tonal range, color rendition and also contrast.

Sharpness: I could not find any sharpness issues between all test results. Hoya and B+W maintained the same level of sharpness as compared to the image without filter in both test scenarios.

Base on the test result my main concern would be the B+W filters and its tendency of overexposure. This would be dangerous for a photographer especially when confronted with a high contrast scene where the risk of blown highlights would be magnified with this filter attached.

As to whether its worth to have a UV filter, given the minimal impact it had on image quality demonstrated above I believe its a worthy investment. Don't you agree?

Tuesday, March 24, 2009

Lightroom 2 Book for Digital Photographers


I recently switched workflow from a ViewNX / Capture NX combo to Lightroom / Photoshop combo. I personally found the new combination to be more efficient and faster especially when it comes to the management of bulk images. I won't go further into the which one is more superior or this software can do that while the other one cannot debate.

The more I use the more question I had, which lead me scouring the internet for information which lead to even more questions than I originally had. Some of the Lightroom 2 questions which were bugging me:
  • How should I organize my files now that I am using Lightroom? Should I keep it in a proper folder with proper categorization or should I just import / move all the folders via the Lightroom import option?
  • Stupid questions like what happens after I import and I delete the files or I move it?
  • How do I apply batch or global corrections? Can it do like what Capture NX batch process can? Is it faster? or worse?
  • What happen to my Nikon colors? What has Ligthroom done to it? Why is it different?
  • A tons of other questions which will take another 2 page to add.
So I took some time to visit the local bookstore. I spent an hour browsing through a few Lightroom 2 books, while some were decently good in explanation others were downright confusing. When I look at the first few pages of this book I knew this was the one I needed. Why you may ask?
  • Step by Step Guide - I was looking at a book which would tell me how should I proceed in the organization of my images for long term. I found it here. I like to questions things or how its done so what I liked was it told me what to do and what not to do and most importantly why that was the best way, which at this stage was what I actually needed.
  • Structure - The book is structured just like how Lightroom is structured so you will feel like someone is actually by your side walking you through the software. It guides you from the very beginning Library -> Develop -> Slideshow -> Print -> Web.
  • Language & Style - Scott Kelby is no stranger to the Adobe community and his witty / plain simple easy to understand makes it interesting.
  • Experience - Unlike traditional text book style writing Scott incorporates a lot of real world examples, sharing his workflow and experience. He is tell you upfront the problems he has faced so you will learn from his mistakes.
So for the price of RM 171.90 from your local bookstore it will give you the knowledge and the edge you need to survive competitively as a digital photographer. I got mine at Borders Bookstore in Tropicana Mall (Last two books left).

P/S: Did the book answer all my questions? well I am still reading it and so far it's getting interesting.

Monday, March 16, 2009

Nikkor 70-300mm Zoom Lenses

I recently got an email from a friend which was undecided between two high powered nikkor zoom lenses with the same focal length. Although they share similar zoom range they are totally different. There are a total of 3 variations of this lens:

  • First Edition: 70-300mm f/4-5.6G
  • Second Edition: AF 70-300mm f/4-5.6 D ED
  • Third Edition: AF-S 70-300mm f/4.5-5.6 G IF-ED VR

I do not think the first edition is still in production though you still see it on Nikon website. The second edition you tend to see a lot being sold on the forums but its not longer on Nikon website because it has been superseded by the third edition which is the AF-S 70-300mm f/4.5-5.6 G IF-ED VR

To cut the long story short, if you are on a budget it’s a no brainer go for the second edition. But if you are not on a budget go for the third version. Why?

  • 9 aperture blades and they are rounded which translates to better bokeh rendition
  • Comes with VR. Given the zoom range the VR version plays an important role especially when it comes to handheld shooting.
  • 2 x Extra-low Dispersion glass which helps eliminate chromatic aberration (CA)
  • AF-S you can run this baby on your D40, D40x, and D60

Detailed Review by Photozone:

Tuesday, February 10, 2009

TTL: Nikon AF-S TC-14EII 1.4x Teleconverter


Since you click on this link you may already know what a teleconverter is. If you don't please click here. I also found a good article on the pros and cons of using teleconverters which you should look at before investing on one. Now lets get on with business. Like many I am a Nikon user and like many I have invested on AF-S VR Zoom-Nikkor 70-200mm f/2.8G IF-ED and found at times wishing I had a longer reach hence the search for a teleconverter to pair with it.


After countless of googling and reading I have decided to go with the above because it produces the least image degradation (softness, color contrast, CA etc.). The question you would then be asking is whether I am satisfied with it? and the answer would be yes. Check out the pictures they are all taken with a D300 + 70-200 + TC-14EII and tell me what you think.


Monday, February 02, 2009

Fujifilm s8000fd

Fujifilm s8000fd introduced in 2007 is one of the early "big zoom" cameras with 18x. The recent ones hover around the 24x range. Some of you may be wondering what can a point and shoot camera do?

Switch to macro mode with maximum zoom range you can create image like this.

So the moral of the story is if you are lazy to lug around a DSLR with a zoom lens you may want to consider one of these.

Thursday, January 29, 2009

Nikon D3 Professional Technical Guide


Stumbled upon this interesting guide when I was browsing some sites. Don't let the word technical guide scare you in fact I find this much better than the manuals which comes with the camera. The autofocus and exposure section is invaluable, the D700 and D300 users will stand to gain from this as well. To cut the long story short, both beginner and advance users will stand to gain from this document.

Download the manual here.

Saturday, January 24, 2009

Sakae Sushi through the lens of Nikkor 35mm F/2D


After the short overview of this gem here, I promised to give it a test in the field and post some sample pictures. This lens was mounted the D3 with the latest firmware release 2.01 (If you have not upgraded you should the AF-C is FAST!). Please note that if you mount this on the DX body the crop factor would turn it into a 52.5mm lens.

Here are some sample images taken at Sakae Sushi Mutiara Damansara with the D3+35mm lens combination. As usual the food is excellent and the company was even better.


Exif

Summary:

1) Lens Size - its small so that is a plus point.
2) Field of View - I love it. I find the 50mm on a D3 a bit tight.
3) Focusing Speed - Its not as fast as the 50mm but its still fast.
4) Color - I am not complaining
5) Sharpness - Razor sharp images
6) Bokeh - You decide

Friday, January 23, 2009

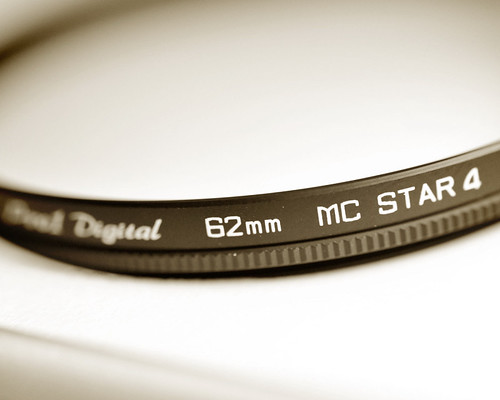
Star Filter

Once in a while we envision our images to have a certain effect. No doubt, some of these effects can be easily replicated in Photoshop or any other image editing programs but not all effects can be replicated with the desired outcome.

One of such desired effects which is difficult to be replicated in Photoshop without looking entirely faked would be the star effect. I for example tend to prefer using a real star filter as oppose to "getting" that effect in Photoshop.


Since we are in Malaysia, we don't have a wide variety of filter selections so we have to take what comes by. Hoya is a reputable brand which makes good filters so... the choice is not that difficult. I chose the Pro1d Star 4 version because it can be rotated just like a CPL filter which enables us to change the stars. I purchase 2 of this:

1) 62mm thread size which can be used for the 60mm and the 105mm macro lens. This would be ideal for product and portraits.

2) 77mm thread size which can be used for the 24-70 and the 70-200. This is ideal for landscapes and portraits.

Now time for the picture to do the talking.

Thursday, January 22, 2009

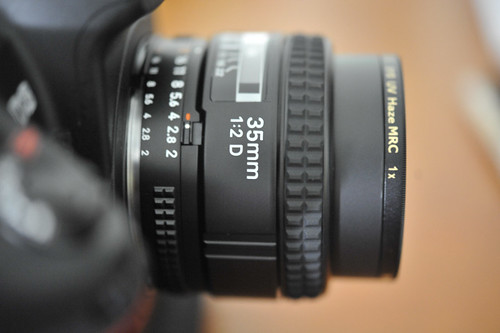
AF Nikkor 35mm f/2D

This little gem is one of the few lenses which lay hidden since Nikon introduced their killer trinity lens combination (14-24 - wide, 24-70 - mid, 70-200 - tele). During the film days this lens was frequently used for landscapes and street photography. Having a fixed large aperture of f/2 makes it an interesting "wide" angle lens for hand held low light photography.


I also decided to do a quick test on the Carl Zeiss 35mm f/2 since I was there. Check out the images below.


Though they are not identical in terms of distance but there were not much changes in the subject and lighting. The Zeiss is close to 3x the price of the Nikkor. I don't know if you can tell the difference between the two; but to my untrained eye my money is on the Nikkor why?

1) Value for money the Nikkor is almost 3x cheaper. Although the Zeiss has a very solid feel and built quality but would you really be willing to pay for it?

2) Half the weight of the Zeiss and almost half the size. Put that on a D3 and lugg around two bodies and you will be thinking of ways to lighten the load.

3) Auto Focus - I really can't leave without it can you?

4) If you don't pixel peep can you actually "see" the sharpness or details difference? Do you print your work at 100%?

So you still say the 35mm Zeiss is better? well then... the Zeiss would be your choice if:

1) You do a lot of pre-focus shooting
2) You like manual focus
3) You got cash to burn

As for me, this lens would replace the Nikkor 24-70mm f/2.8 which I currently use for events since I cannot afford the discontinued Nikkor 28mm f/1.4 or the Nikkor 35mm f/1.4. I will be test driving this lens in the next wedding dinner so stay tune for more updates.

Saturday, January 17, 2009

Delicious through the lens of Nikkor 105mm f/2.8G IF-ED

The food was great the company was better. I shall let the lens do the talking. As usual macro lenses makes excellent product shoots. Images below were taken using Nikkor 105mm f/2.8G IF-ED.

If you like a versatile macro lens the Nikkor range would not disappoint. Although the 105mm version provides a tighter field of view as compared to the AF-S Micro Nikkor 60mm f/2.8G ED lens, you can never go wrong with either one. Superbly sharp and the colors are beautiful.

Verdict:

Macro lenses are a must have for any photographer. These lenses are so versatile, you can do macro shots, product shots, food shots and even portraiture (The sharpness is beautiful). So which one to choose. Let me help :)

60mm if you
- Are on a budget
- Don't require the working distance which the 105 offers
- Prefer a wider Field of View

105mm if you
- Not on a budget
- Need the additional working distance
- Prefer a tighter Field of View

Friday, January 16, 2009

Paddington through the lens of Nikkor 60mm f/2.8G

Went out on a date with my wife to Paddington House of Pancakes at The Curve on Christmas Eve. Decided to take the AF-S Micro Nikkor 60mm f/2.8G ED lens for a spin. Was interested to test some low light capabilities. The images below are some samples taken during the outing and I took the liberty of leaving the exif intact for the food shots. The only post processing done for the images below were levels and curves on Capture NX 2.

You’d be surprise that some of the images ISO were as high as 6400 and produce usable results with fantastic details. The 60mm on a FX makes it an interesting portrait lens while on a DX you would be getting 90mm which would give it a tighter crop. The image below was taken with the AF-S Micro Nikkor 60mm f/2.8G ED lens on a D3.

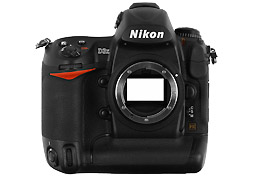
DxOMark review for the Nikon D3X

With a DxOMark Sensor score of 88 points, the Nikon D3X takes the lead of dxomark.com ranking as of January 14, 2009.

Nikon D3X definitely takes the lead within its category and will be remembered as the first camera clearly demonstrating more than 12-bit effective depth of information.

Click here for full review.