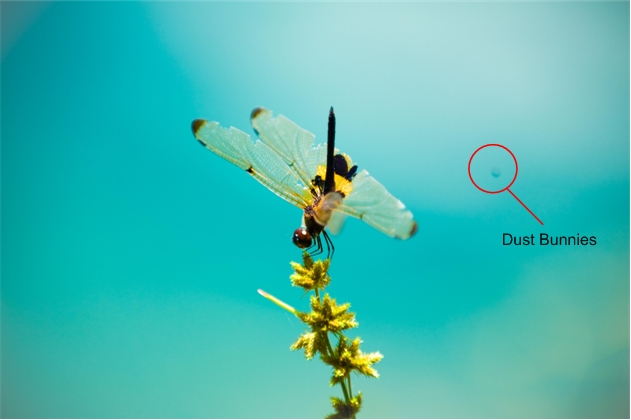
 Dust is everywhere. Some you can see some you can’t. Sooner or later no matter how cautious you are whether you like it or not you will encounter them on your photographs. Dust seems to be more prevalent on FX sensors as these sensors seems to have magnets which attract these dust bunnies.
I recently had one of these bunnies on my images. Though this can be easily removed via Capture NX or Photoshop having it showing up across 50 images an above can be irritating and adds additional time to your workflow.
So how do we solve this? You can either send it back to Nikon, or your local camera store or you can do it yourself. It’s not that scary once you get the hang of it.
Here is what you need to know, there are two category of dust the dry ones and the wet ones. The dry ones are easy to deal with which we will cover here but the wet ones require a little bit more attention which I will not cover here and I suggest you send it back to Nikon or your local camera store. So how do I know what type of dust is on my sensor? Easy hehe if the dry method shown here doesn’t work its probably wet ones.
Before we proceed, let me make a few points clear.
- Point 1 – I will not be held liable if anything goes wrong. You do this on your own risk.
- Point 2 – Do not attempt to use any form of force. If force is required means something is wrong.
- Point 3 – When in doubt please get someone experience to do it for you.
- Point 4 – Wash and dry your hands before doing this.
- Point 5 – Since you will be exposing your camera please do it in an enclosed environment with no wind.
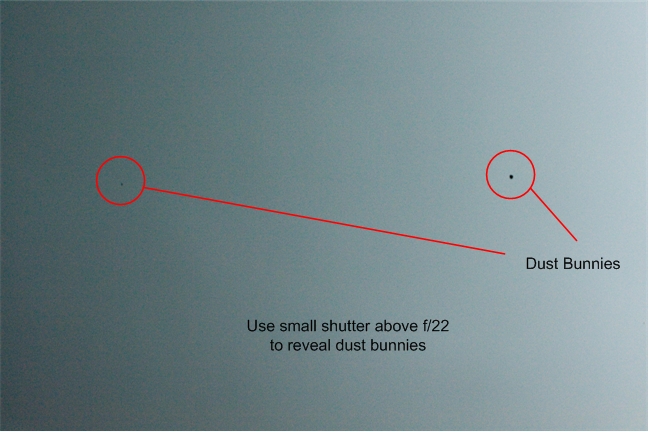
Step 1: You can easily find dust bunnies by using a small shutter e.g. f/22 and shooting against a clear light background e.g. white paper or blue sky etc.

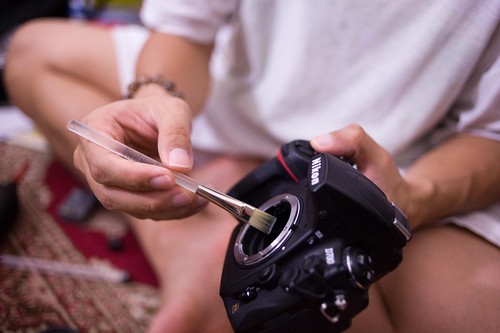
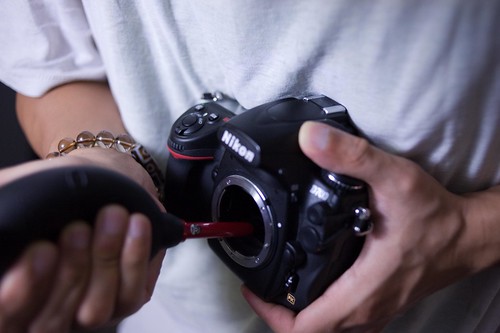
Step 2: Dry cleaning requires a strong blower with a long nozzle and a lint free / oil brush similar to the one in the picture. Both tools should not costs you an arm and a leg :)

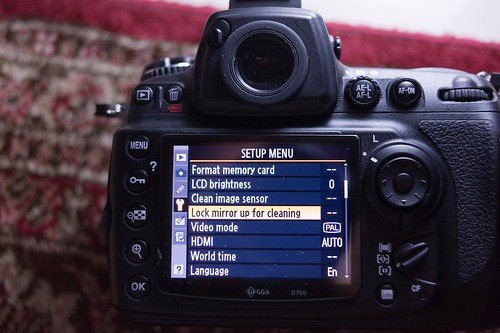
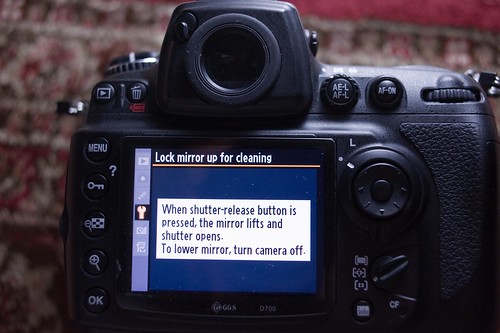
Step 3: Put your camera into cleaning mode demonstrated below. You need to have a fully charged battery else you cannot select that option.


Step 4: Begin the dry cleaning process with the brush. Ensure the brush is clean before using it. You can use the blower to blow off dust which sticks to the brush. "Gently" brush the sensor which should dislodge even the most stubborn dust NO PRESSURE REQUIRED. Give it a few gentle brush strokes. Once you are done, proceed with the blower and once done power off the camera.


Step 5: Proceed to step 1 to see if there is still dusts left and repeat the process when required.
Step 2: Dry cleaning requires a strong blower with a long nozzle and a lint free / oil brush similar to the one in the picture. Both tools should not costs you an arm and a leg :)

Step 3: Put your camera into cleaning mode demonstrated below. You need to have a fully charged battery else you cannot select that option.

Step 4: Begin the dry cleaning process with the brush. Ensure the brush is clean before using it. You can use the blower to blow off dust which sticks to the brush. "Gently" brush the sensor which should dislodge even the most stubborn dust NO PRESSURE REQUIRED. Give it a few gentle brush strokes. Once you are done, proceed with the blower and once done power off the camera.
Step 5: Proceed to step 1 to see if there is still dusts left and repeat the process when required.


great tips from you thanks for sharing bro....
ReplyDeleteI had some dust bunnies.. since i didn't have the brush and all.. i just point my camera downwards and use the menu for cleaning the sensor twice.. it seems to work for that case.
ReplyDelete